


When people see a finished bronze statue, they often notice the color, shape, and fine details first. What they do not see is the long production process behind it.
So, how are bronze sculptures made?
Most detailed bronze sculptures are produced through the lost-wax casting method. However, casting is only one part of the complete process. A finished bronze sculpture usually passes through design, clay modeling, mold making, wax preparation, casting, welding, polishing, patina, inspection, packing, and installation.
At our sculpture factory, we use this process for many types of bronze art, including bronze figures, animals, religious statues, monuments, and large outdoor sculptures.
In this guide, I will walk you through the process step by step and explain what really matters at each stage.
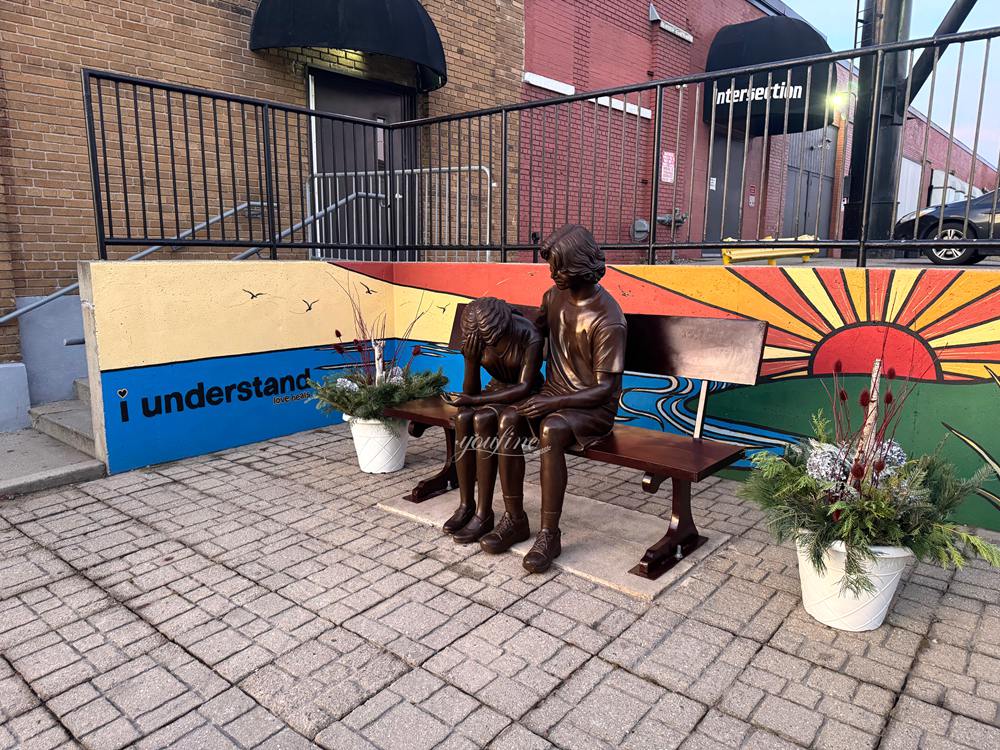
YouFine Client Custom Couple Sculpture Feedback on the Installation
Why Is Lost-Wax Casting Used for Bronze Sculpture?
Lost-wax casting is widely used for artistic bronze sculpture because it can reproduce very fine details.
For example, the process can preserve:
- facial features;
- hair and clothing folds;
- animal fur and muscles;
- fingers and small decorations;
- complex curves and textures.
It is also suitable for large sculptures because a big statue can be divided into smaller sections, cast separately, and then carefully welded together.
If you want to understand the history, principle, and advantages of this technique, you can also read our guide: What Is Lost Wax Casting?
Step 1: Inspiration for the Artwork
Every bronze sculpture starts with a design.
For an existing design, we may work from photographs, drawings, or a previous sculpture model.
For a made-to-order project, the customer may provide:
- reference photos;
- sketches;
- architectural drawings;
- dimensions;
- installation location;
- design ideas.
For some projects, we also prepare 3D models or design drawings before production begins.
At this stage, we confirm important details such as the sculpture size, pose, direction, base design, surface color, and installation method.
For large public sculptures, we also need to think about structure, transportation, lifting, and installation before the clay model is made.
This early planning prevents many problems later.
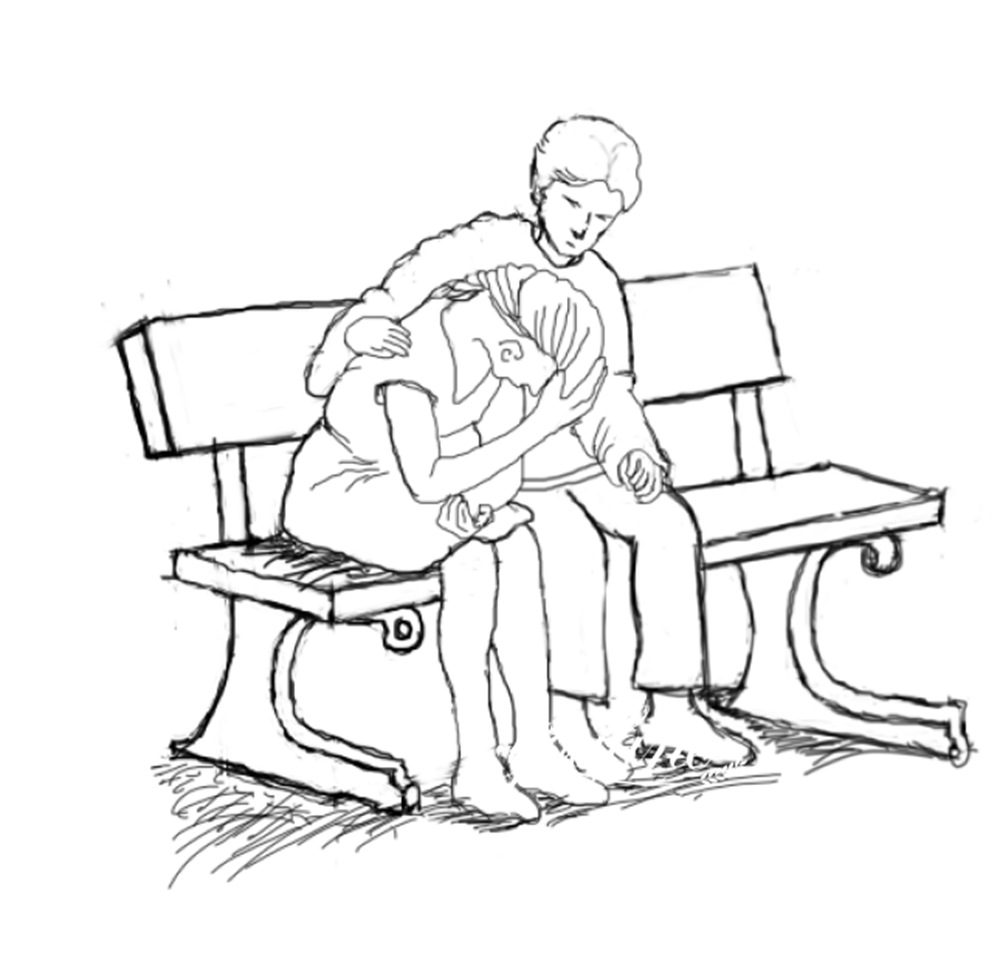
Design Sketches for the Couple Sculpture
Why are Reference Photos Important?
Let us look at how we start a custom bronze couple sculpture. Everything begins with a conversation. The client tells me their love story. I ask for photos from different angles. This helps us understand their faces and body language. Photos give our artists the truth. We could not guess how a person looks. We need clear images of the couple. I always tell clients to send at least ten photos.
Organizing the Design Details
We sort the client’s ideas into a simple plan. Here is how we break down the inspiration phase:
We also look at resources like custom made service to study classic poses. After we agree on the design, we are ready to touch the clay.
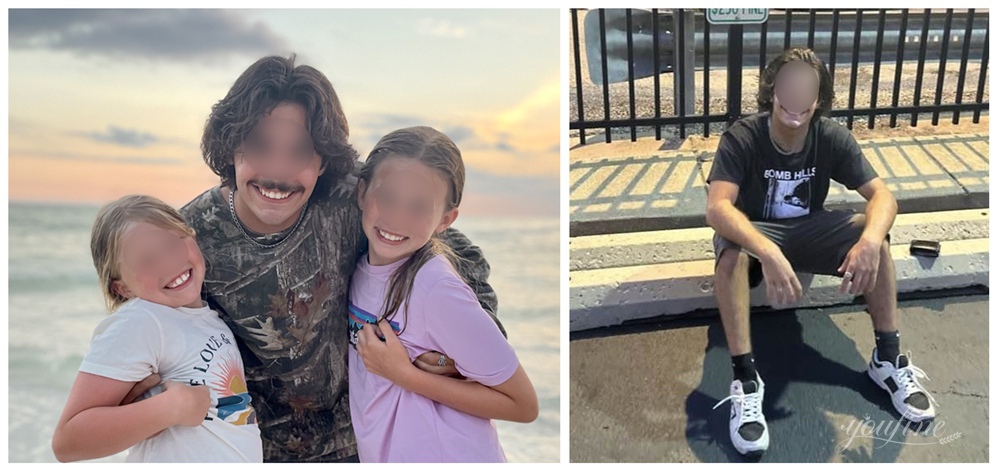
Inspiration for the Artwork of Husband’s Photo
Step 2: Sculpting in a Clay Model
The clay model is one of the most important stages in bronze sculpture production.
The artist first creates the form in clay.
For a figure sculpture, we pay attention to:
- body proportions;
- facial expression;
- hands and feet;
- clothing;
- posture.
For an animal sculpture, we focus on:
- muscle structure;
- movement;
- body proportions;
- fur or skin details.
For custom projects, we normally send photos or videos of the clay model to the customer for confirmation before moving to the next stage.
This is important because once mold making begins, major design changes become more difficult.
A good bronze sculpture starts with a good model.
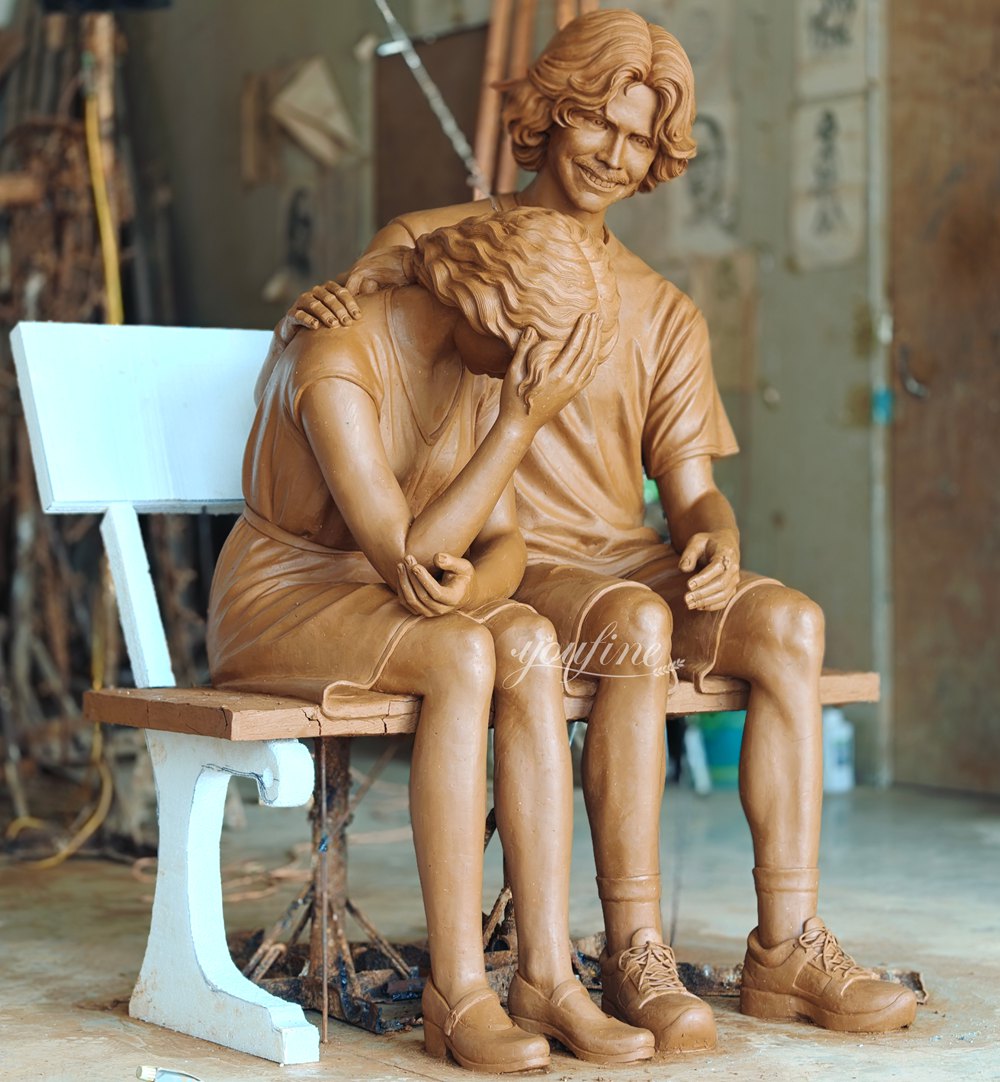
Couple Sculpture Clay Model
Building the Skeleton
Before we touch the clay, we would build a strong frame. We call this an armature. It acts like human bones. Without it, the heavy clay would fall down. We use steel pipes and wire to make the shape of the couple.
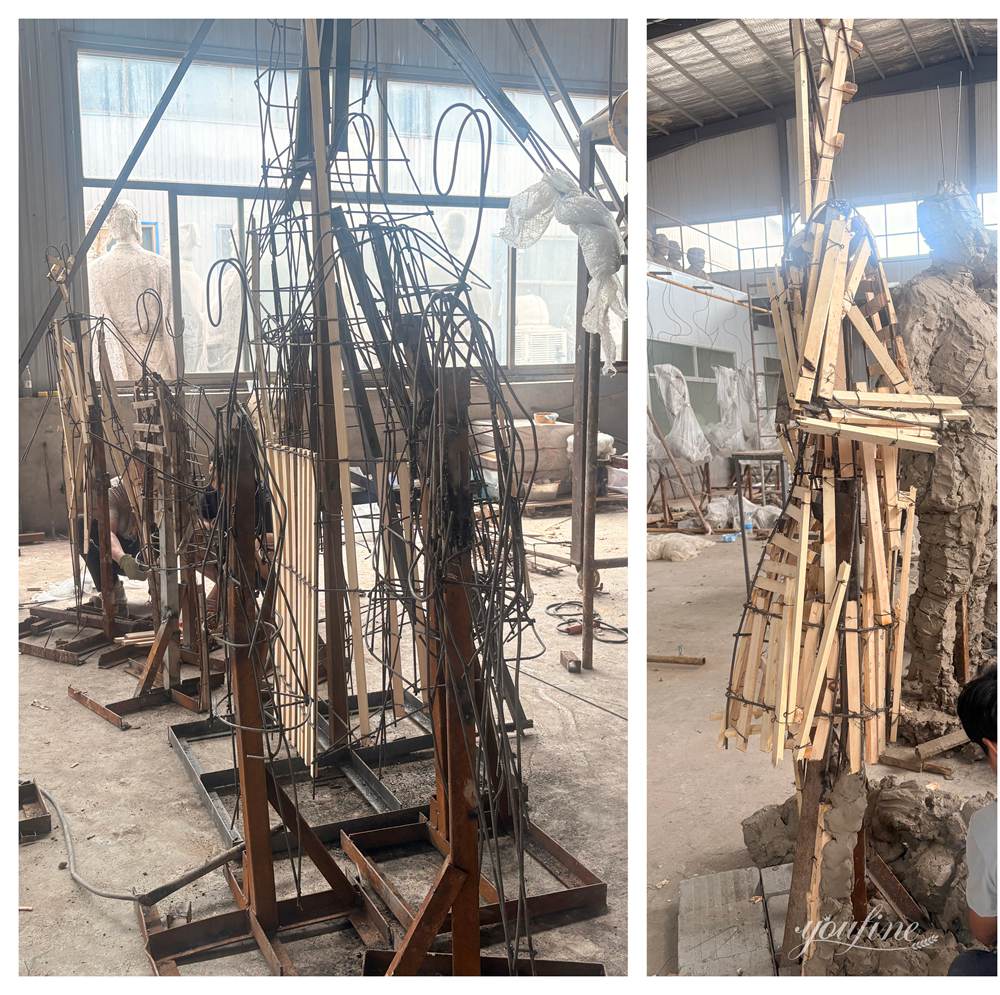
Building the Clay Model skeleton
Shaping the Clay
Next, our artists push clay onto the metal frame. They use their hands and small wooden tools. They work on the couple’s faces first. Capturing a likeness is very hard. It takes many years of practice. We spend weeks just on the eyes and smiles.
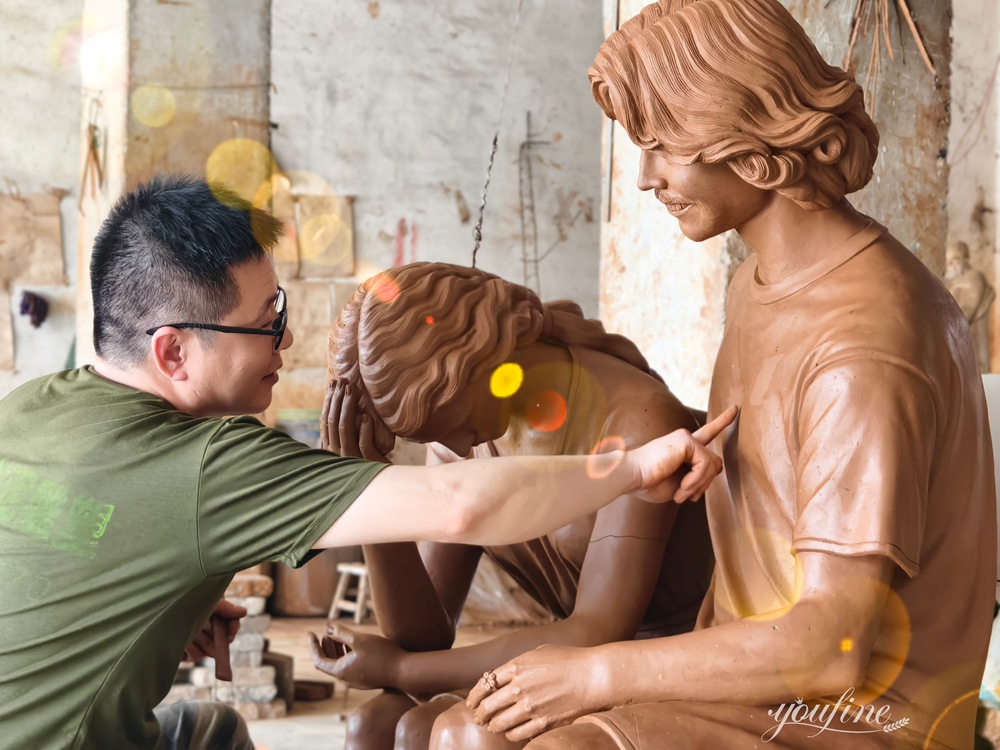
The Artist Refining the Details
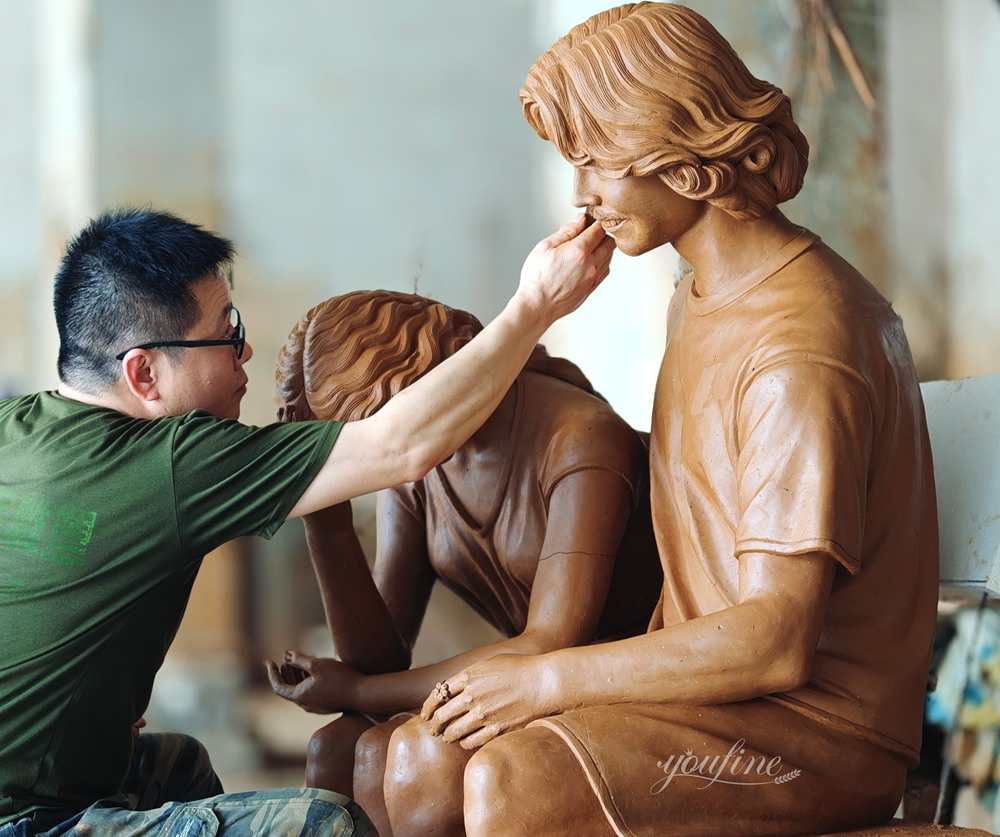
Client Approval Process
I never move to the next step without the client’s okay. We send lots of photos and videos to the client.
Only when the client is completely happy, we finish sculpting the clay.
Step 3: Making the Liquid Silicon Rubber Mold
After the clay model is approved, we make a mold from it.
Silicone rubber is commonly used because it can capture small surface details.
A supporting mold is usually added outside the silicone layer to keep the mold stable.
For a large bronze sculpture, the mold cannot always be made in one piece.
We divide the sculpture into practical sections according to its shape and size.
This also makes later wax making and bronze casting easier to control.
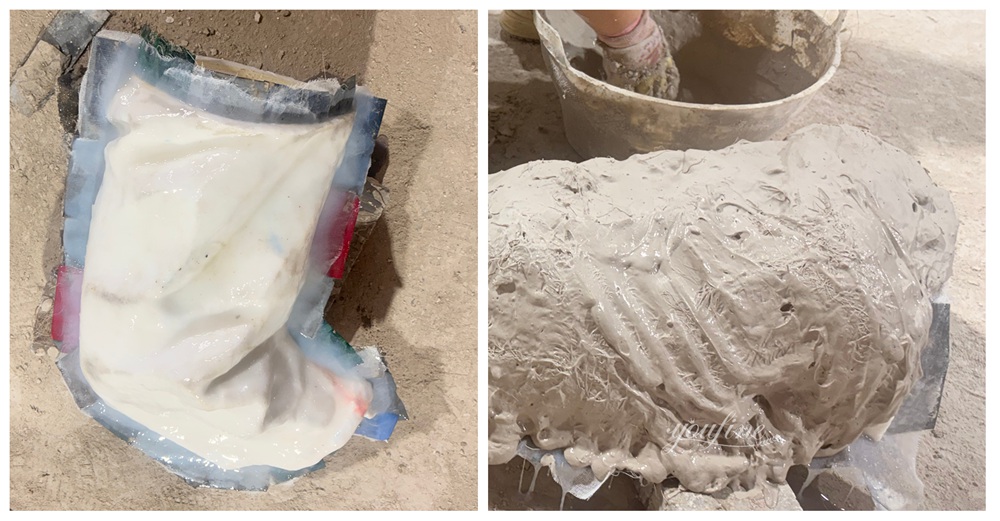
Making the Liquid Silicon Rubber Mold
Adding the Hard Shell
Silicone is very soft. When we take it off the clay, it would lose its shape. To fix this problem, we build a hard mother mold over the silicone. We usually use fiberglass or plaster for this step.
Opening the Mold
Once the plaster is hard, we open the mold. We take out the original clay. The clay is usually destroyed in this step. But do not worry. We now have a perfect negative copy inside the silicone.
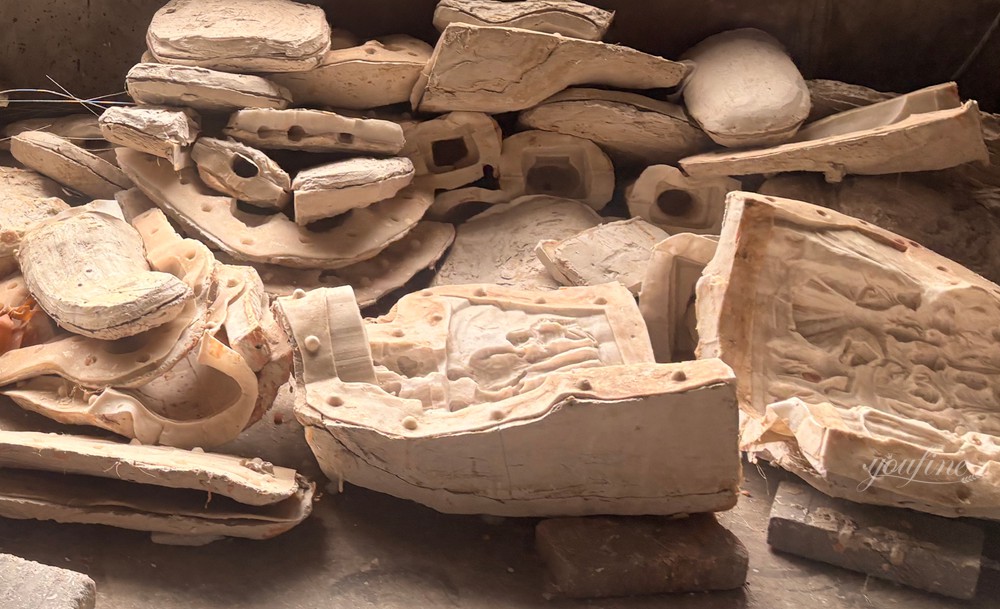
Plaster and Silicone Mold Components
Step 4: Creating a Wax Mold
Liquid or softened wax is applied inside the mold to create a hollow wax copy of the sculpture.
Once the wax has cooled, it is removed from the mold.
At this stage, our craftsmen inspect the wax surface carefully.
Small defects are repaired by hand.
This process is often called wax chasing.
We check:
- surface details;
- edges;
- joints;
- thickness;
- missing details;
- visible imperfections.
This stage matters because any problem in the wax model may appear again in the final bronze casting.
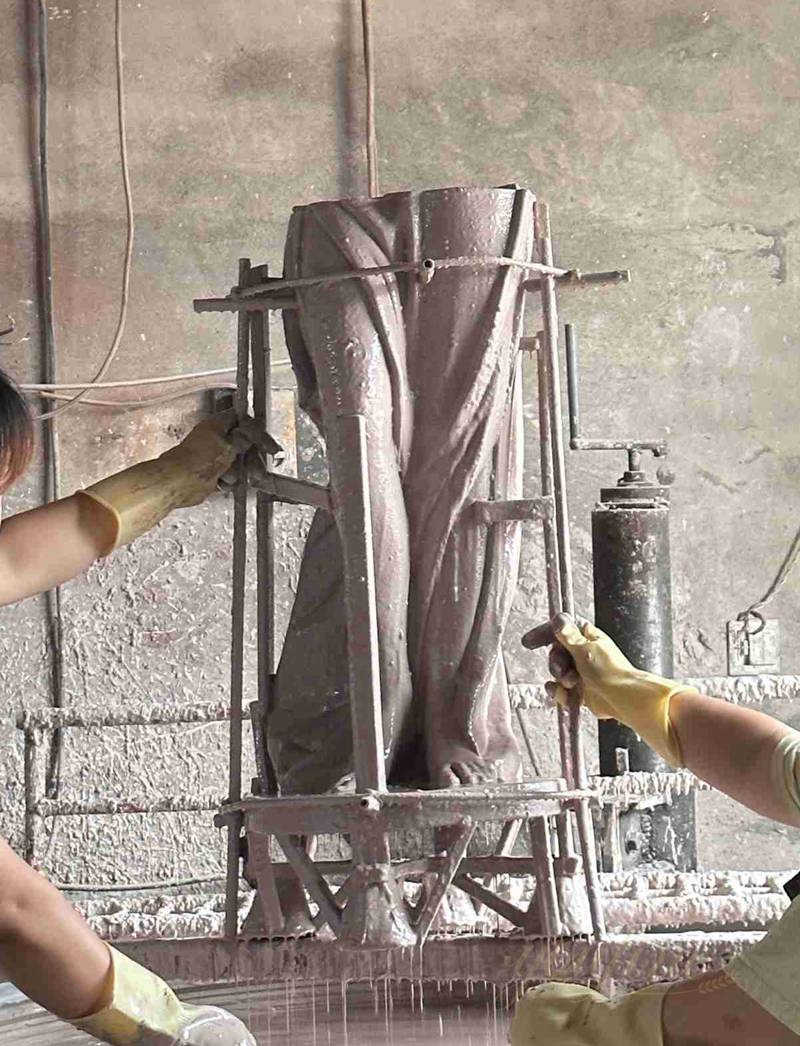
Step 5: Add Sprues and Gating
Before the wax model can be cast, a system of wax channels is attached to it.
These channels are known as sprues and gates.
They have two main purposes.
First, they allow molten bronze to flow into the mold.
Second, they allow air and gases to escape during casting.
The position and size of these channels need careful planning.
Poor gating can cause problems such as incomplete filling or casting defects.
This part of the process is not very visible to the final customer, but it has a major effect on casting quality.
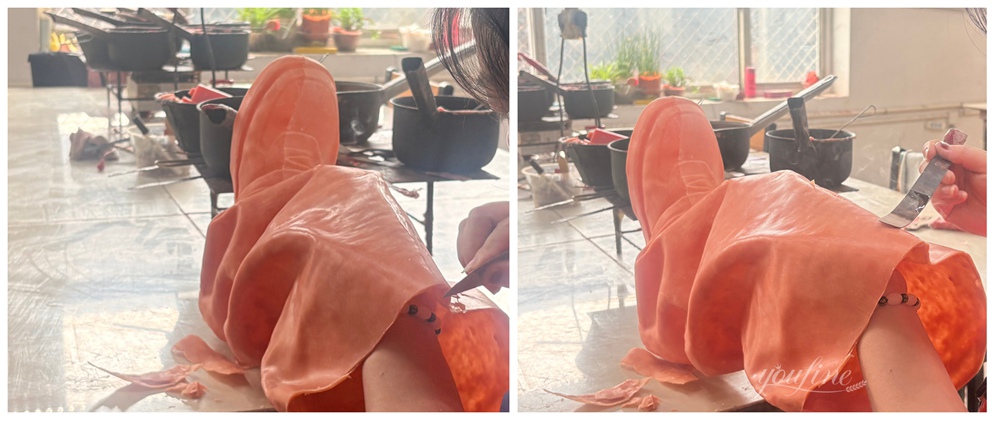
Refining the Wax Shell
Pouring the Hot Wax
Now we need to make a wax version of our couple. We melt special casting wax in a big pot. It gets very hot. We carefully pour this liquid wax into the empty silicone mold. We do not fill the whole thing. We just want a thin layer on the inside.
Rolling and Cooling
We pick up the mold and turn it around. The wax covers all the inside walls. Then we pour the extra wax out. We wait for it to cool down and get hard. We do this three or four times to build thickness.
Chasing the Wax
When we open the mold, we pull out the wax couple. Sometimes there are small mistakes. Air bubbles could make small holes in the wax.
Our workers fix these problems by hand. We call this process chasing the wax. The wax look exactly like the final bronze should look.
Step 6: Build the Refractory Casting Shell
The wax model is then covered with a heat-resistant casting shell.
This shell must be strong enough to hold molten bronze.
Several layers are usually built around the wax model.
The exact shell system may vary depending on the foundry and the size of the sculpture.
For a large sculpture, different sections are prepared and cast separately.
At this point, the wax sculpture begins to look more like a solid shell-covered form than a sculpture.
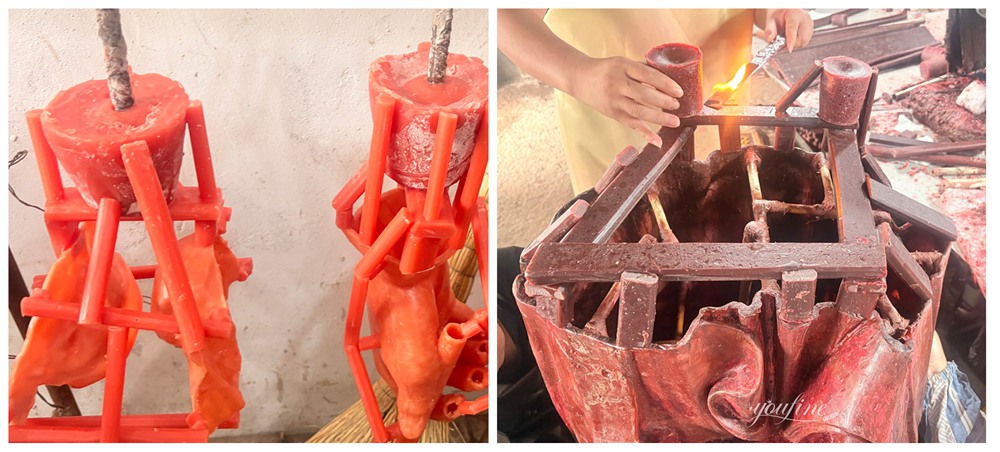
Creating the Gating System
What are Sprues and Gates?
We could not just pour metal onto the wax. The metal needs a road to travel on. We use long sticks of wax to make these roads. We melt the ends of these wax sticks and stick them to the wax couple. We call this the gating system.
Directing the Metal Flow
We plan the paths very carefully. If the metal cools down too fast, it would block the road. The whole sculpture would fail. We attach a big wax cup at the top. This is where we would pour the bronze.
Letting the Air Out
When liquid metal goes in, the air come out. If the air is trapped, the bronze would have big holes in it.
We attach small wax tubes to the tops of the couple’s heads and hands to let the air out safely.
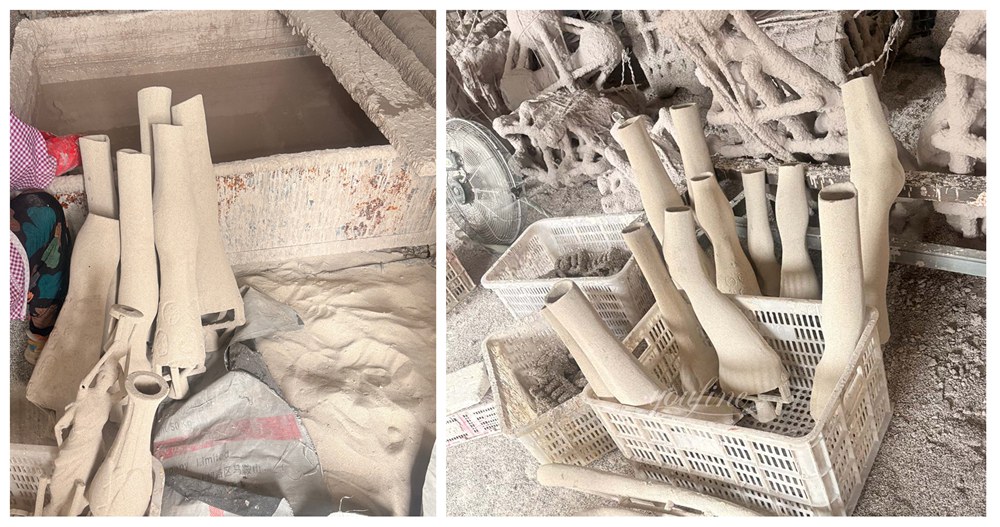
Creating a Sand Shell
Step 7: Burning out the Wax
The shell is heated so that the wax inside melts and flows out.
This leaves an empty cavity inside the shell.
That is why the technique is called lost-wax casting.
The original wax form is literally removed during the process.
The empty space left behind has the same shape as the wax model.
This cavity will later be filled with molten bronze.
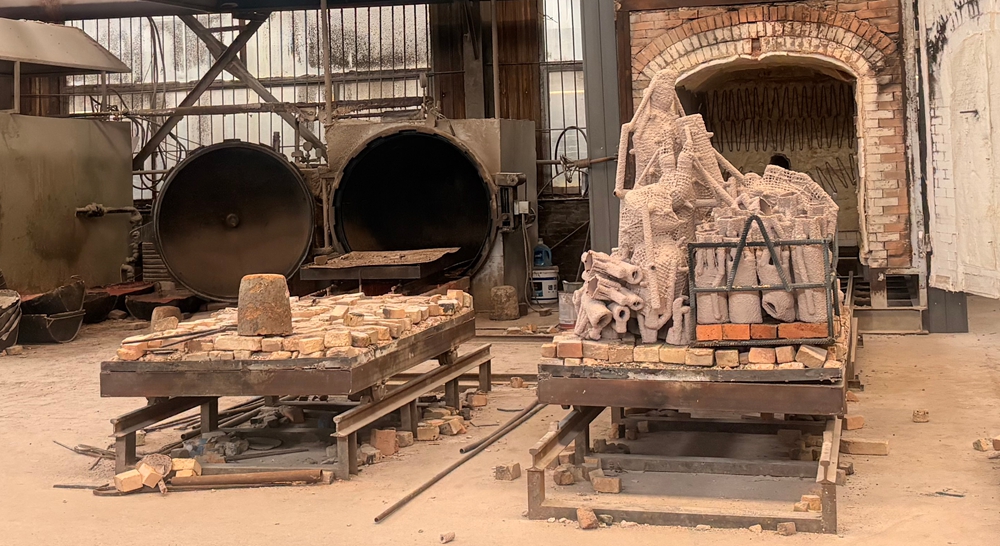
Furnace for Heating Molten Bronze to High Temperatures
Heating the Kiln
We put the heavy shells into a big oven called a kiln. We turn the fire up very high. The temperature reaches over 1000 degrees Celsius. The sudden heat does two important things at the same time.
Emptying the Shell
First, the heat makes the sand shell very hard, like a brick. Second, the wax inside melts instantly.
The wax flows out through the cup we made earlier. Now we have an empty shell. The inside of the shell is a perfect negative copy of our couple.
Step 8: Melt and Pour the Bronze
Now we reach one of the most important stages.
Bronze is melted in a furnace until it becomes liquid.
The hot bronze is then carefully poured into the prepared casting shell.
The metal flows through the gating system and fills the empty cavity.
Good control during this stage is essential.
The craftsmen must consider:
- metal flow;
- mold condition;
- pouring speed;
- temperature control;
- section size.
Large bronze sculptures are normally cast in several manageable sections instead of one enormous piece.
This improves production control and reduces risk.
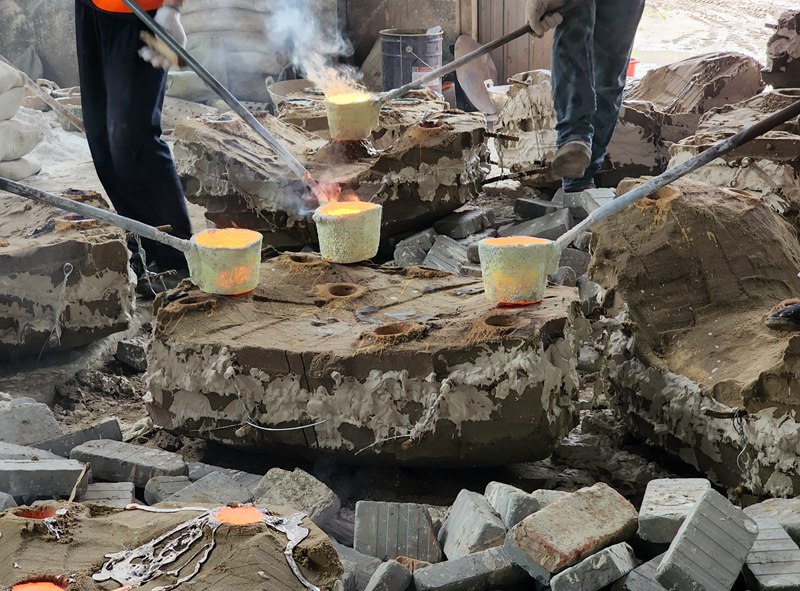
Pouring the Liquid Bronze
Melting the Metal
This is my favorite part of the process. We use a huge furnace to melt solid bronze blocks. Bronze is mostly made of copper and tin. We heat it to about 1200 degrees Celsius. It turns into a bright, glowing liquid. It looks like a small volcano.
Safety First
This step is very dangerous. One drop of liquid bronze could cause a terrible burn. Our workers wear special silver suits, thick gloves, and face shields. They work together perfectly.
The Pouring Action
Two workers use long metal bars to lift the pot of liquid bronze.
They pour the bronze into the cup of the sand shell. The bronze flows down the pipes and fills the couple’s shape. We wait a few hours for the bronze to cool and become hard bronze.
Step 9: Welding the Bronze Sculpture
After the bronze has cooled, the outer shell is removed.
For the first time, the rough bronze casting becomes visible.
The sprues and extra metal are cut away.
Then each casting section is inspected.
We look for problems such as:
- incomplete casting;
- surface defects;
- porosity;
- deformation;
- missing details.
If a section does not meet the required standard, it may need repair or, in some cases, recasting.
This inspection should happen before final assembly.
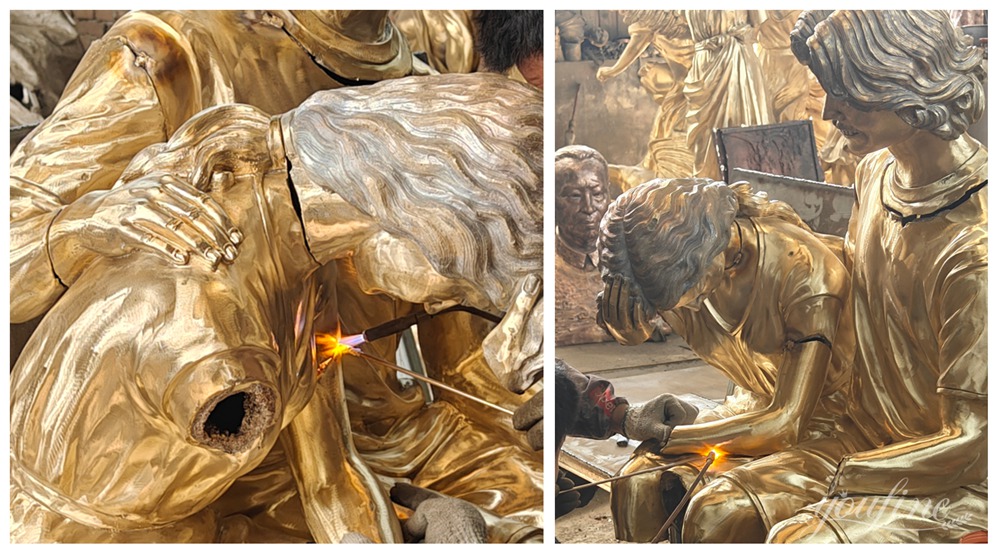
Welding the Bronze Sculpture Components
Breaking the Shell
After the bronze is cold, we get it out. We use hammers to smash the hard sand shell. The shell breaks and falls to the floor. Now we could see the bronze couple for the first time. But they are covered in metal pipes from the gating system.
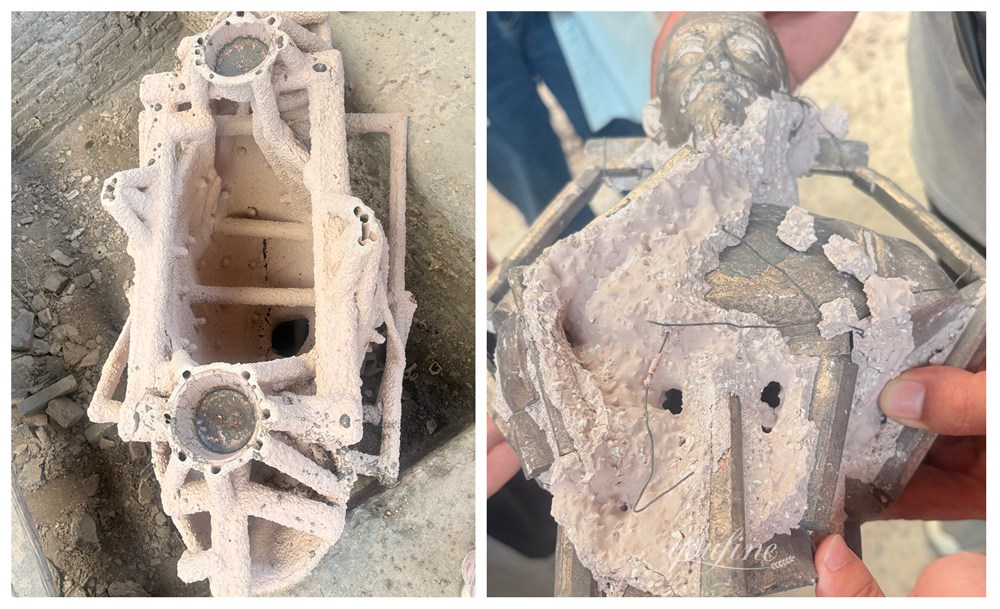
Breaking the Sand Shell
Cutting the Pipes
We use plasma cutters to chop off all the extra metal pipes and vents. We only want the sculpture parts. We recycle the extra metal for the next project.
Joining the Pieces
We could not cast a couple sculpture in one piece. We cast the heads, arms, and bodies separately. Now we put the puzzle together.
Our welders use pure bronze wire to melt the pieces together. The joints be very strong so the statue would last forever.
Step 10: Weld the Bronze Sections Together
Large bronze sculptures are usually made from several cast sections.
These parts now need to become one sculpture again.
Our craftsmen weld the sections together according to the original model.
For large outdoor sculpture, internal support structures may also be used depending on the design and engineering requirements.
After welding, the seams should not remain obvious.
The next stage is therefore just as important.
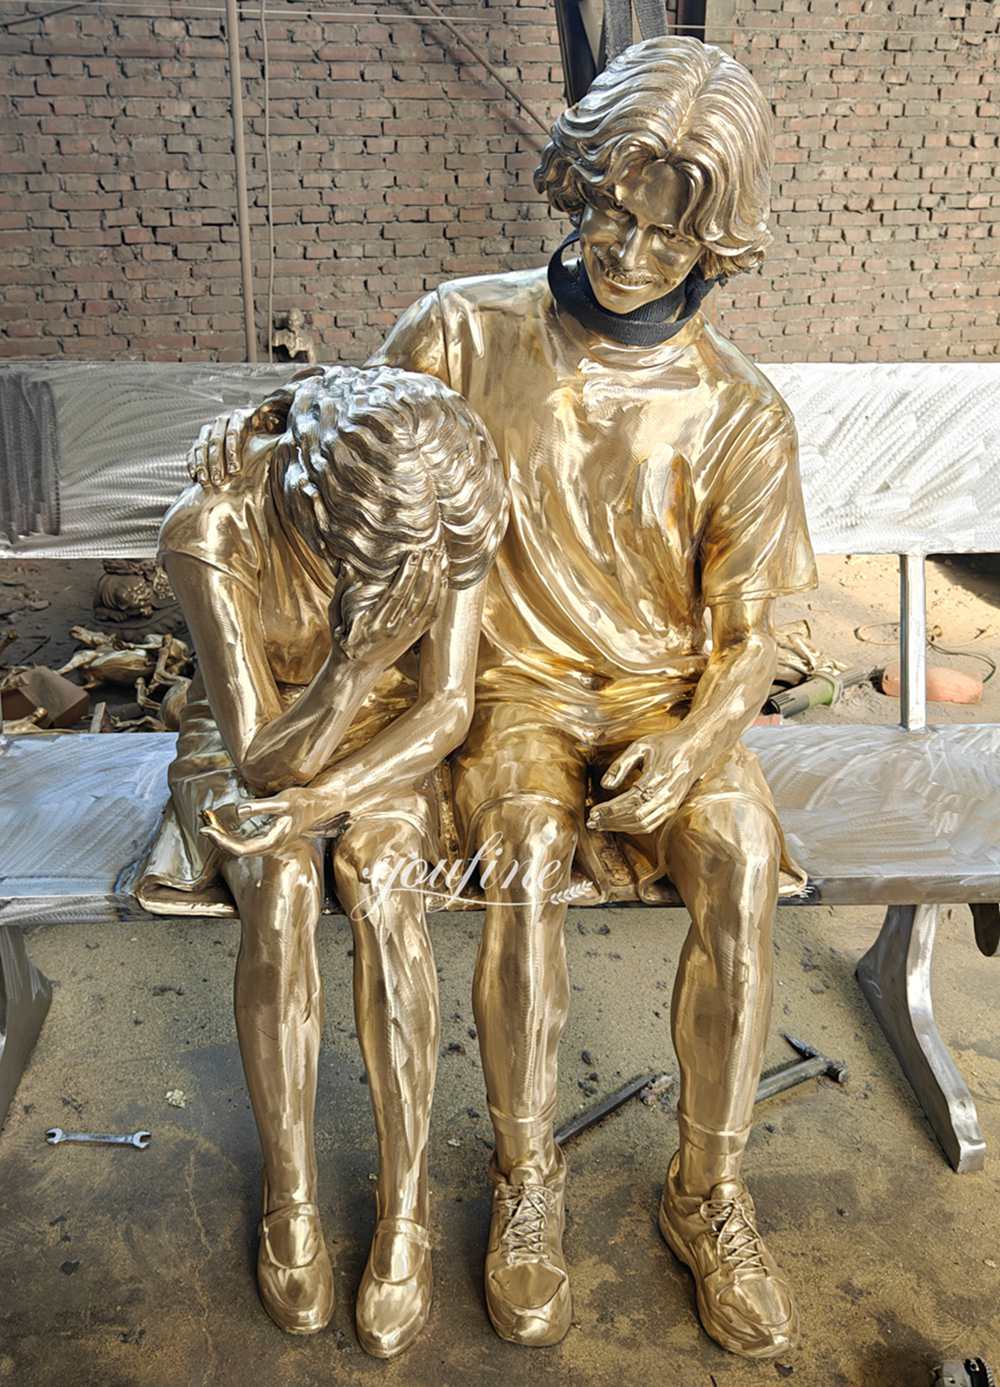
The Polished of a Couple Sculpture
Removing the Weld Lines
After welding, the sculpture looks like Frankenstein. There are big, ugly scars where the pieces were joined. We make these scars disappear. Our workers use electric grinders to shave down the high spots of the welds.
Restoring the Texture
When we grind the metal flat, we also erase the artist’s original texture. We put it back. If the weld went across the man’s suit jacket, we use small metal tools to carve the fabric lines back into the hard bronze.
Polishing the Surface
We use different tools to make the metal look clean.
Finally, we spray the whole couple sculpture with tiny glass beads. We call this sandblasting. It cleans the metal and makes it look like shiny gold. It is now ready for color.
Step 11: Chase and Polish the Surface
After welding, craftsmen work on the joints by hand.
This process is called metal chasing.
The goal is to restore the original sculpture details so that the welded areas blend naturally with the rest of the surface.
For example, if a welding seam crosses:
- clothing folds;
- animal fur;
- hair;
- skin;
- decorative patterns;
the craftsman needs to recreate those details.
Grinding and polishing are also used to smooth the surface where necessary.
A well-finished bronze sculpture should not look like many metal pieces joined together.
It should look complete.
Step 12: Applying the Patina
We use chemicals and heat to create rich, beautiful colors on the bronze surface.
Patina gives a bronze sculpture much of its final visual character.
Common bronze colors include:
- traditional brown;
- dark brown;
- black;
- green;
- antique green;
- golden bronze tones.
Patina is not simply a layer of ordinary paint.
Traditional bronze patina is created through controlled chemical reactions on the metal surface.
The final color can vary depending on the chemicals, temperature, surface preparation, and finishing technique.
For outdoor sculpture, a protective wax or coating may be added after the patina is complete.
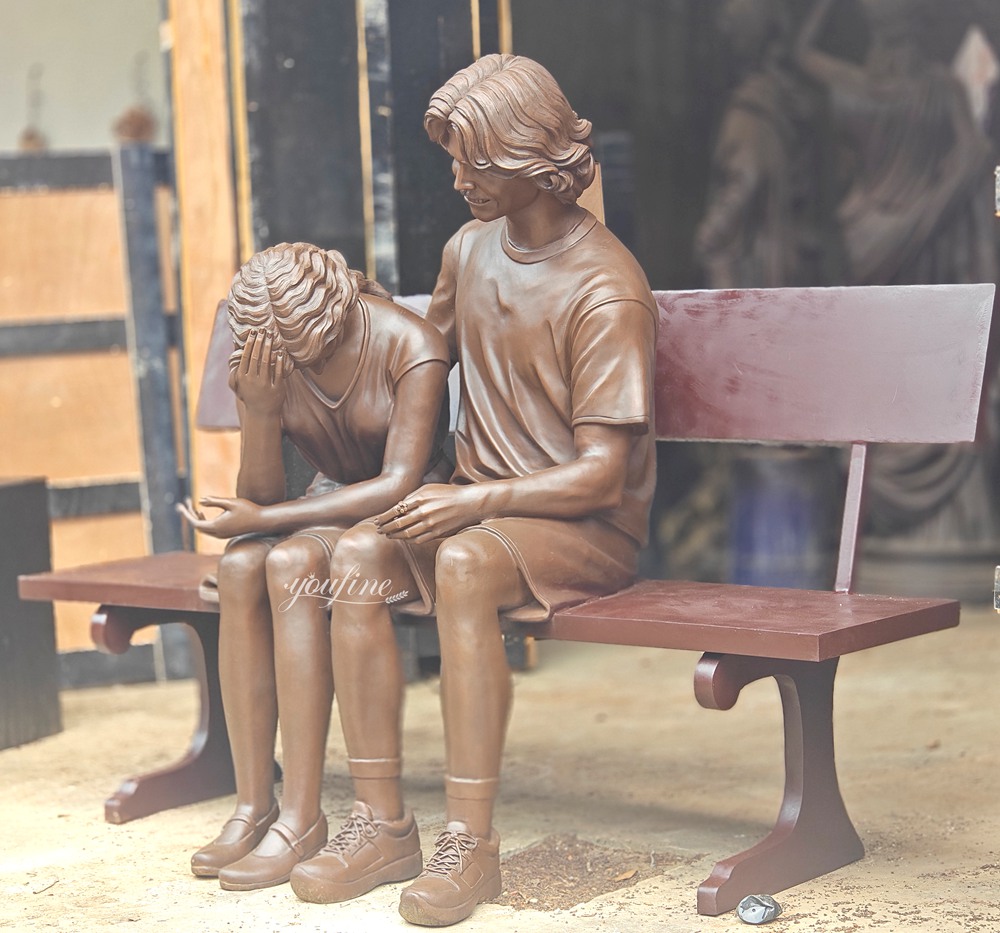
The Patinated Figure Sculpture
Heating the Bronze
Bronze does not use normal paint. Paint would peel off in the sun. Instead, we use a patina. A patina changes the color of the metal itself. First, our patina artist uses a large gas torch to heat the couple sculpture. The bronze be hot for the magic to work.
Spraying the Chemicals
While the metal is hot, the artist sprays different chemical liquids onto it. The chemicals hit the hot bronze and change color instantly.
For our couple sculpture, we usually use a warm, rich brown color. We make the deep parts darker and rub the high parts to show a little gold.
Sealing the Color
When we get the perfect color, we let the bronze cool down. Then we rub hot clear wax all over it. This seals the color and protects it from the rain. If you would like to learn more details about coloring, you could visit the Wikipedia entry on Patina.
Step 13: Final Quality Inspection
Before packing, we carry out another inspection.
For a large bronze sculpture, we normally check:
- overall appearance;
- surface finish;
- sculpture dimensions;
- welding areas;
- patina consistency;
- structural connections;
- base plates;
- installation points.
For made-to-order projects, customers may also receive production photos and videos before shipment.
For large sculptures, trial assembly can be especially useful.
It allows us to check how different sections fit together before everything leaves the factory.
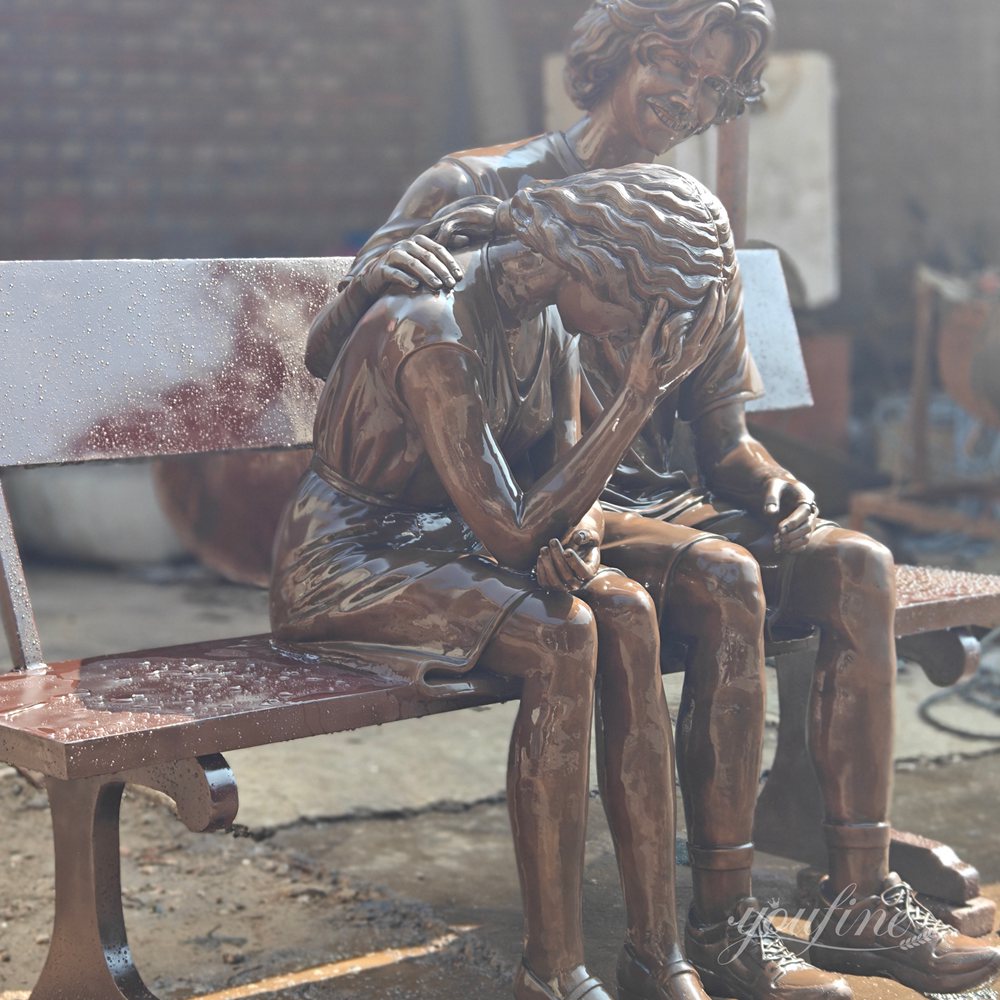
Before Waxing, Gentle Washing
Step 14:Packing, Shipping, and Installation
The production process does not completely end when the sculpture leaves the workshop.
Packing and installation also need planning.
Depending on the sculpture, packaging may include:
- protective wrapping;
- steel supports;
- reinforced wooden crates;
- separate packing for large sections.
For outdoor projects, the installation method may use:
- anchor bolts;
- pre-embedded steel plates;
- reinforced foundations;
- internal steel structures.
Large sculptures may require cranes during installation.
We can prepare installation drawings and guidance before shipment so the site team knows how the sculpture should be fixed.
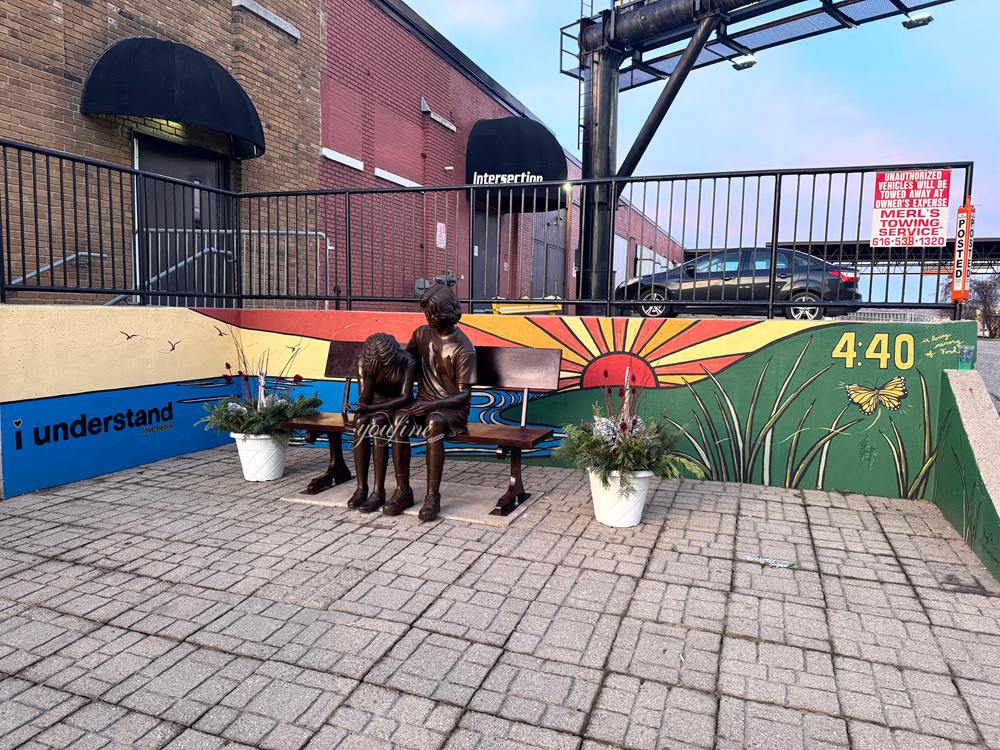
Life-size Sculpture of a Couple Feedback on the Installation
Preparing the Base
A life-size bronze couple sculpture is very heavy. It could weigh over 200 kilograms. You could not just put it on the grass. It would sink into the mud or fall over in the wind. You prepare a strong, flat concrete pad.
The hidden Screws
We do not want you to see ugly bolts on the feet of the couple. We hide the mounting system. We weld long iron bars or thick screws under the statue’s feet.
Locking it Down
When the statue arrives at your home, you would follow a simple plan.
Once the epoxy glue gets hard, the statue would never move. It would stand safely in your garden for you to enjoy every single day.
Frequently Asked Questions about Bronze Sculptures
Still have questions about the bronze casting process? Finding clear answers online is frustrating. I gathered the most common questions to give you simple, direct answers.
Here are the most common questions about making bronze statues. We cover everything from costs and ancient methods to spotting fake bronze and making large-scale monuments. Read our quick answers below to learn more about the art of bronze casting.
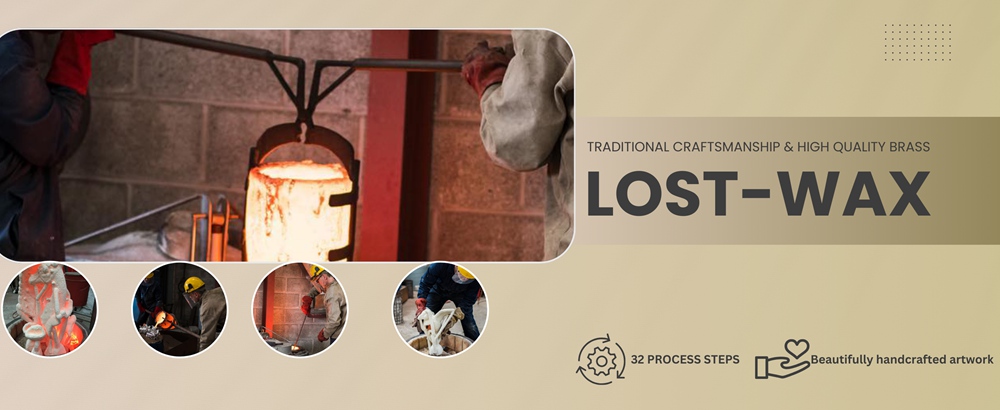
Traditional Lost-wax Casting Method
Why Are Large Bronze Sculptures Cast in Several Pieces?
A large bronze sculpture is rarely cast as one giant piece.
There are several reasons.
First, a very large mold is difficult to control during casting.
Second, smaller casting sections make it easier to maintain detail and quality.
Third, divided sections are easier to handle, transport, weld, and install.
The important part is not whether the sculpture is made in sections.
The important part is whether those sections are joined correctly.
After good welding and chasing, the finished sculpture should visually read as one complete artwork.
How Long Does It Take to Make a Bronze Sculpture?
Production time depends heavily on the sculpture.
A relatively simple sculpture may take several weeks.
A large custom monument can take several months.
The biggest factors include:
- sculpture size;
- design complexity;
- clay modeling time;
- customer revisions;
- number of casting sections;
- surface detail;
- patina;
- structural requirements.
Rushing the process is not always a good idea.
Some stages, especially clay modeling, wax preparation, casting, welding, and surface finishing, need time.
What Affects the Quality of a Bronze Sculpture?
When customers compare bronze sculptures, the bronze material itself is only one part of the story.
Quality also depends on the workmanship.
From our experience, the biggest factors include:
The Original Model
Poor proportions or weak details in the clay model cannot be fixed simply by using better bronze.
Mold Accuracy
A good mold helps preserve the original details.
Wax Chasing
Small defects should be corrected before casting.
Casting Control
Poor casting can create holes, incomplete details, or other defects.
Welding
On large sculpture, welding quality directly affects both appearance and structure.
Surface Chasing
Good craftsmen can make welding seams nearly disappear.
Patina
A good patina should suit the sculpture and remain visually consistent across different cast sections.
These details explain why two bronze sculptures with a similar design can have very different final quality.
Is Every Bronze Sculpture Made Using Lost-Wax Casting?
No.
Lost-wax casting is one of the most widely used methods for detailed bronze sculpture, but it is not the only method.
Other techniques may include sand casting or other metal production methods.
However, when a sculpture contains complex shapes, fine artistic details, or detailed figure work, lost-wax casting is especially useful.
That is why it remains such an important technique in bronze sculpture production.
If you have more questions about custom bronze statues, please contact YouFine Art Sculpture. We are happy to help you.
Final Thoughts
Making a bronze sculpture is not simply a matter of melting metal and pouring it into a mold.
The quality of the finished artwork depends on every stage before and after casting.
A good clay model preserves the artistic idea. Careful wax work improves casting accuracy. Proper welding and chasing make separate sections look complete. Patina gives the bronze its final personality.
For us, lost-wax casting is the heart of the process, but experienced craftsmanship throughout the entire production cycle is what turns bronze into sculpture.